Do you want to know the best angles to position your camera lights, the right background to use, and many more?
 Scientifically, it only takes 13 milliseconds for the human brain to process an image. That doesn’t leave a lot of time for your potential customers to see and respond to everything you light.
So how should you make your product standout?
There are three things you need to consider if you want your product to stand out.
- Your product
- Background
- Foreground
How you choose to light each part will have an impact on the focus and the attention your product gets.
Let’s begin with setting the product apart from the rest of the scene. There are a number of lighting techniques that can be exercised when doing this.
1. Edge Light

You can effectively focus on your product with an edge light. When you use an edge light you separate the product from the background and bring it towards the viewer’s attention. An edge light is usually positioned anywhere behind your product out of sight of your camera’s field of view.
Most times a good position is three-quarter left or right behind your product. Depending your product and the space available. Setting a backlight could require arming a light out on a boom or a C-stand arm or mounting it from somewhere above.
2. Orientation

The right orientation will also make your product stand out. The placement of the product in relation to how your camera is positioned will catch light in different ways. If you’re getting some undesired highlights adjust your lights angle of incidence to the product by either raising, lowering, bringing it out or in, left or right.

As another example, these shoes here are not reflective, but even surfaces that are matte or flat can reflect or deflect light and impact your overall lighting when creatively positioned.

Look at how you can see the change in the shoes texture from your point of view.
3. Background

One basic way to control the background, no matter how you light it, is by exposing the background less than the product.
As you can see in this example, the light is focusing on the product and it obviously stands out than the background.
And, in turn, it draws our eyes to the product first. If you have some room, a long lens, and are able to throw your background out of focus, check this cool trick out.
You can slow down your background by placing a single or double net behind your subject directly in the shot. Just make sure you’re not too close.
This also works wonders if you want to use the natural light outside. With a shallow enough depth of field, you can ultimately slow down your background without having to fly a large overhead, in order to control the background light from the sun. Certain times the background will work exposed higher than the product. But remember, the focus of your scene, and where your eye is drawn to first in your shot.
4. Foreground

Foreground is most of the time neglected, but it is essential to make whatever is interacting directly with or in front of your object not become more of the focus than the product itself.
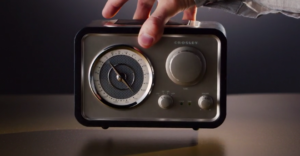
Think about a hand coming into a shot to grab a sports drink. If the hand is overexposed or masks the lighting from the subject, your product may not look good.
For your next project, break down the lighting set up into these three key parts: your product, background and foreground.
Watch how each affects your shot. Light can bring life to your product, so understand it, see it, learn about it, and have fun.
- DIY Chicken Wire Jewelry Holder - June 27, 2022
- Jewelry Designer Manager Alternative - December 8, 2019
- 3 Tips To Immediately Boost Your Sales Today - May 12, 2019

